You can stream videos, music, pictures, online videos, and more using Orb. You do not have to install anything on your PS3 to stream files.
How to Stream to PS3 Using Orb
0
You can stream videos, music, pictures, online videos, and more using Orb. You do not have to install anything on your PS3 to stream files.
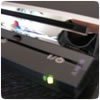
The Yellow LED/Light of Death (or YLOD) on the PlayStation 3 indicated a hardware failure. It’s similar to the Red Ring of Death (RROD) on the Xbox 360 but less common, according to Sony. It’s frustrating if you have ever experienced this problem before, as you cannot start up your PS3 or even eject the disc. The YLOD can mean one of several things: faulty power supply, disconnected CPU/GPU, fan/cooling failure, or excess dust/dirt.
If you have a dead or non working Blu-ray drive here is a tutorial to help you replace your Blu-ray drives lens yourself from another working Blu-ray drive or just purchasing the entire part needed (KEM-400AAA).
Video:
Please note that if you have warranty or a store receipt return/call Sony and they should be able to do it for free. But if your out of warranty or don’t have any on your PS3 (for any devilsh reason), you can easily fix your PS3. (Sony charges about $150 to do it).
1) Open the top cover of the PS3.
2) Pull out the power plug for the Blu-ray drive.
3) Carefully pull up the Blu-ray drive and unclip the data cable ribbon from PS3 drive.
4) Remove the two silver screws on top right and bottom right according to the picture (screwdriver is pointing at them)
5) Unsrew the 3 black screws to the left as well (screwdriver pointing)
6) Remove the top metal sheilding of the Blu-ray drive, exposing the guts.
7) Remove the top frame now that we are inside to reveal the laser (unscrew the screws)
8) Once that is done you should be staring at the Blu-ray laser.
9) Remove the Blu-ray lens screws
10) More screws to remove (screwdriver pointing)
11) There you go after removing all those screws the laser should easily come out, simply repeat the process for another working Blu-ray drive and extract its Blu-ray lens or just simply buy a replacement part (part #kem-400aaa) and insert it in the Blu-ray drive and start rescrewing.
Hope this can help those unfortuante with a dead bluray drive and no warranty.
If your PlayStation 3 fails to read games or Blu-Ray discs it could be because of a number of reasons (see below). There are only a few options you can try from home to resolve the issue, but the worst case scenario involves sending it off to Sony to get it repaired (which will cost you money). Before you send it off to Sony, follow this guide and try to resolve the issue yourself.
Most of the trophies in Command & Conquer: Red Alert 3 are self explanatory so we’ve only provided help with the difficult ones. Most of the trophies are easy to achieve and can be unlocked in a single playthrough of the game with each nation. The other trophies can be unlocked in skirmish or online modes. There are lots of trophies available in the game, including the all-important Platimum trophy.
Every Thursday, Sony released new content to the PlayStation store. The playable demos, full games and add-on content requires you to download and then install before you can play them. The worst part of this process is the actual downloading and installing of the content – but did you know that you can auto-install the content so you don’t waste time installing it yourself?
Read MoreWe’ve received many emails and YouTube comment about how to access the PS3 recovery menu, so we though we would write up a detailed walk-through to help you out. The PS3 recovery menu is available on firmware 2.50+ and allows you to preform various operations on your PS3, including restore factory settings and reinstall firmware. You can read our original coverage on the PS3 Recovery Menu (including video) too.
The PlayStation Store isn’t available in all countries so it can be difficult to buy games and other content unless you have a credit card registered within the country, for example, buying games from the US PlayStation Store means you need to have a US credit card. Luckily, there is a easy way to get past this restriction through the use of a "virtual" credit card. This method has been confirmed in working for the US, Hong Kong and Japanese PlayStation Stores.
Instructions:
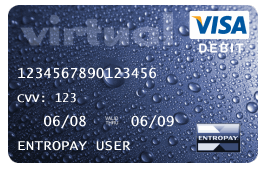
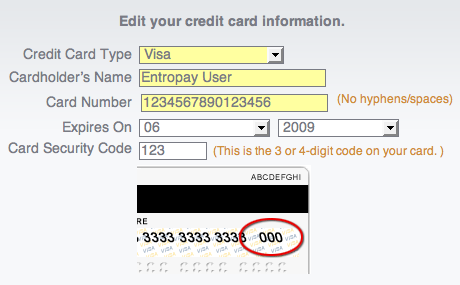
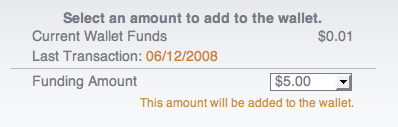
If you cannot edit you billing information on the PS3’s Account Management screen, try again after 10 minutes – it may take a while for your virtual credit card to become active. You virtual credit card must have at a balance of least $10 for it to work.
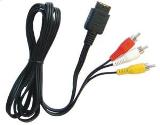
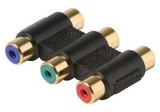
Using HDMI, you cannot record the video signal from the PlayStation 3 since the signal is encrypted. However, you can record the signal when using a PS3 AV cable – this does mean that the quality will be reduced dramatically. We find it easier to record our gameplay action and tutorials directly to a digital format, but you can record the signal to other devices such as a VCR, DVD recorder or PVR. Check out the tutorial below.
Requirements:
 |
 |
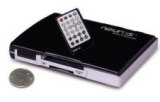 |
| PS3 AV Cable | RCA Adapter | Neuros MP4 Recorder |
Instructions for General Devices:
Instructions for Neuros MP4 Recorder:
Examples:
Check out some of the videos we recorded using the Neuros MP4 Recorder and our PlayStation 3, here are a few:
Having trouble installing games downloaded from the PlayStation Store? Check out the video tutorial below for some help.
Video Tutorial: